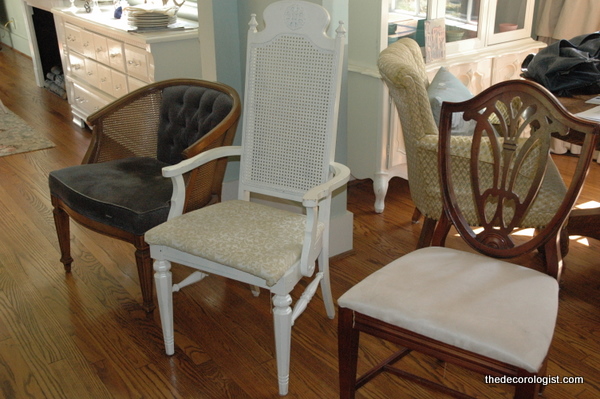
OK, actually the cat was right here with me and it was the baby mice that were away, but I did paint several chairs this week while my kids stayed with their grandparents in Kentucky. Here are the motley crew of chairs that needed work:
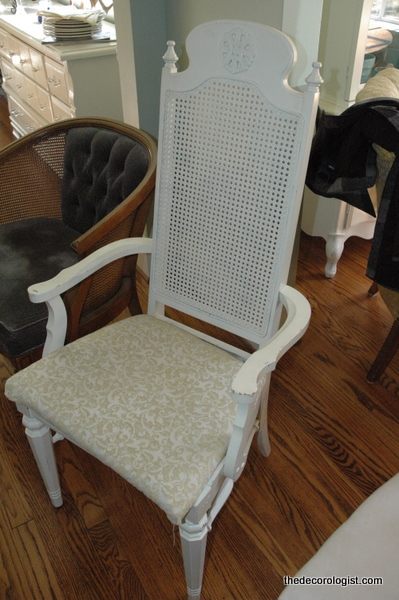
This first one I found a couple of years ago for $10 at a yard sale. At that time it had a walnut wood finish and looked so 1975. I spray painted it white and slapped some leftover fabric on the seat. This worked for me for a while, but I wanted to paint it a punchier color.
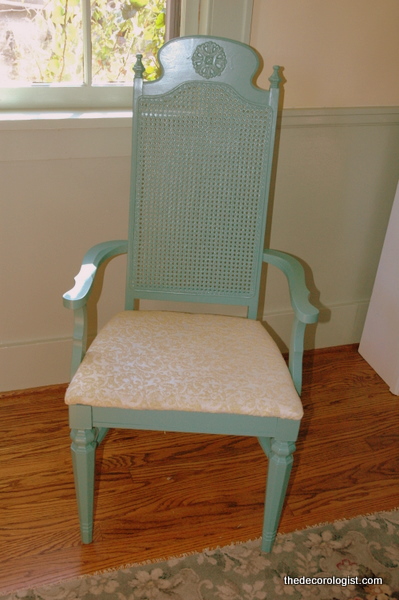
I painted it Benjamin Moore”s Waterbury Green HC- 136 in a semi-gloss finish. This was leftover paint from another project I did here. For now I’m leaving the fabric as-is – but it would really come to life with a more exciting fabric.
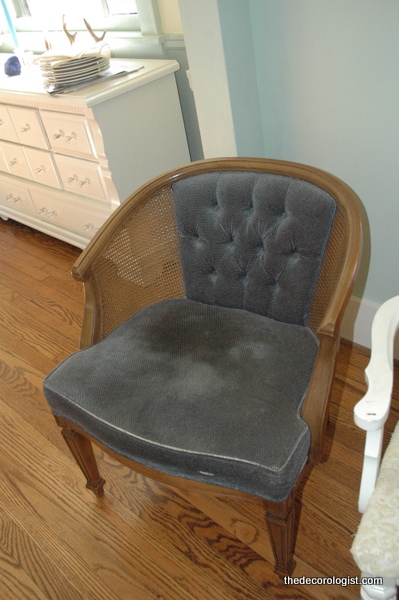
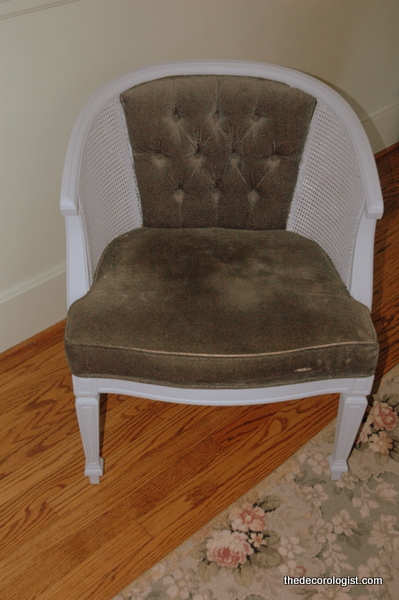
I found this chair for $5 a few weeks ago at a yard sale. I’ve been wanting this style of chair, so I was thrilled with the price!
I painted this one a french blue. It’s a custom mix, because I didn’t want to buy more paint. I took a light blue paint and mixed in a bunch of gray. This is not really the “after,” because I’m not done with it – this fabric is pretty awful. I’m going to have a little custom slipcover made by my talented seamstress at Ruffled Linens – maybe a simple cream linen.
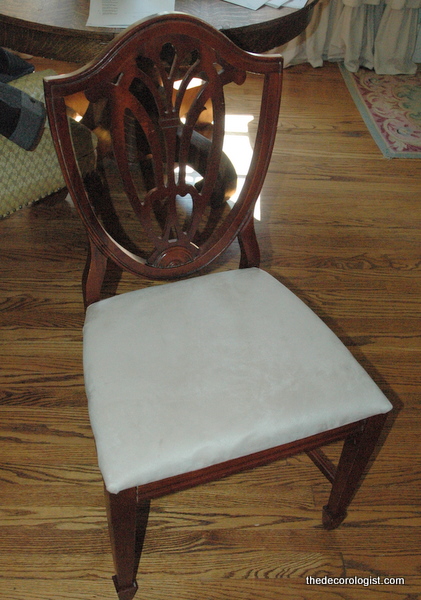
I bought a set of 4 chairs for $50 last summer – again at a yard sale. I liked the backs of these, but knew I wanted to update them eventually. I think I’ll do them all differently, but here’s the before of the first one:
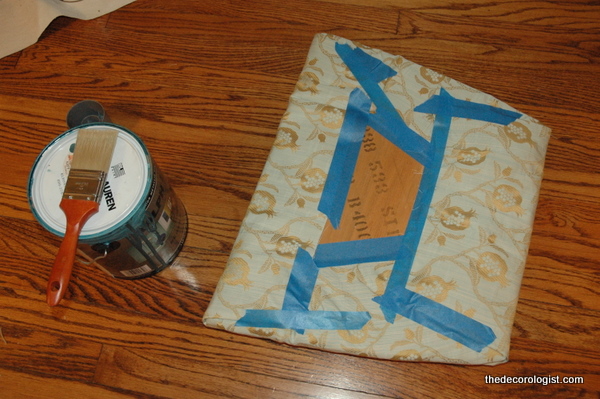
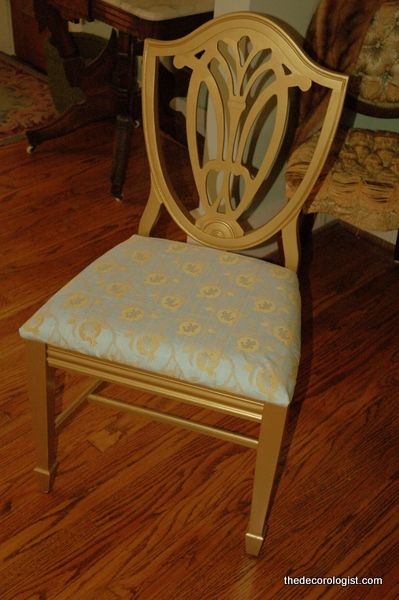
I used this fabulous gilt paint in the Ralph Lauren’s Metallics Line, and I loved how it turned out. I had this scrap of fabric that I thought would work great because of the gold in it. After sanding, priming, and painting all these chairs, I was tired and feeling increasingly lazy, so I reupholstered this chair bottom with painter’s tape. Duct tape is a better choice, but it worked out just fine!
Here she is! Isn’t she lovely?







Oh My Goodness!!! I will never look at old chairs the same way again! I love how a little paint completely transformed all these “dated” chairs for very little money. You are such an inspiration. Thanks for the great info. I really look forward to your emails everyday. 🙂
Thanks, Karina. I always appreciate your encouraging comments!
I like being the keeper of the mice! I like the chairs too!
I love chairs–these turned out beautifully! I haven’t painted any yet, but I have stockpiled quite a few more than my husband cares for in our garage! 🙂
I see you have a bit of a chair fetish like me!!! Picking up the poor castaways whenever you come across them…dreaming of a better life for them. 🙂
Wonderful job with the makeovers! I love the metallic paint. Can you come over and fix some of my adopted chairs now?
Yes, Kelly – I think of it as “rescuing treasure,” dreaming of a better life for my poor little castaways!
Love the chair ideas! Would love to find one for the basement that you worked on with me! If you ever see one out especially yard sale (I love yard sales ) please keep me in mind! Would love to find a nice color for down there!
Enjoy your updates!
I really love the art nouveau-ish design on that last chair. The gold paint really works well for it, too! Great job. 🙂
Kristie, Thank you for stopping by. I have taken a break from blogging, but I’m thinking about starting up again. I love your blog. Kathi
I am getting up the nerve to re-upholster my dining room chairs. We use the dining room table every day and the chair covers show it! 3 kids have grown up in these chairs and they are a solid color! 😀 I like the tape idea b/c I do not have a staple gun or whatever people that know what they are doing use!
just do it! it’s sooo easy. duct tape is the best. send me a before and after shot!
I am looking for hollywood regency chairs myself. Thanks for sharing info about ruffed linens!
Wow! You did an amazing job on the chairs! Vintage and antique chairs just have so much character, it’s great to see them being revived!
You should post your before and after pictures on http://www.picklee.com-a DIY inspriation blog, and community for sharing your creations!
Wow! You did an amazing job on the chairs! Vintage and antique chairs just have so much character, its great to see them being revived!
You should post your before and after pictures on http://www.picklee.com. It’s a DIY inspriation blog, and community for sharing your creations!