Have you ever had a career or life goal that is really more of a secret wish or dream? The design project of my dreams has been to redo a beach property, which seemed unlikely since I live in a landlocked state!

This design project has been in the works since August, and I am so excited to share my plans for this beach vacation property redesign. Built 15 years ago and filled with dated colors and furnishings, the new owners needed an update. Big time. That’s where I come in. After a few whirlwind site visits, extensive color sampling, lots of measurements, and online research, I put together a design plan for the entire home.
Today I’m showing you the plans for the living/dining space and the kitchen. Here’s a few “befores” of the living/dining area:
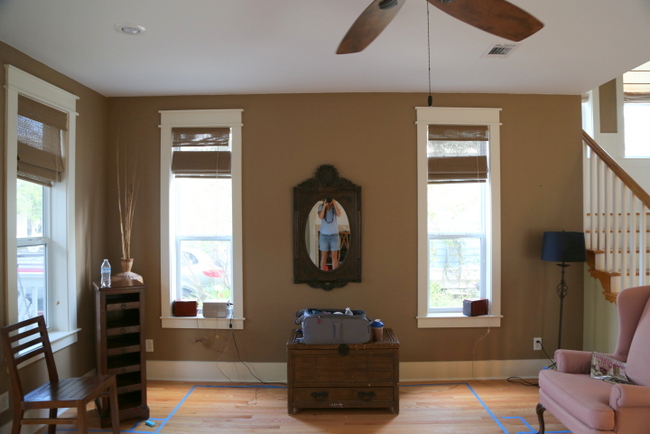 before
There was a large tan sectional previously in this room, but it had already been removed the day I took these photos. My first task was to determine what needed to go and what could be used in the new design.
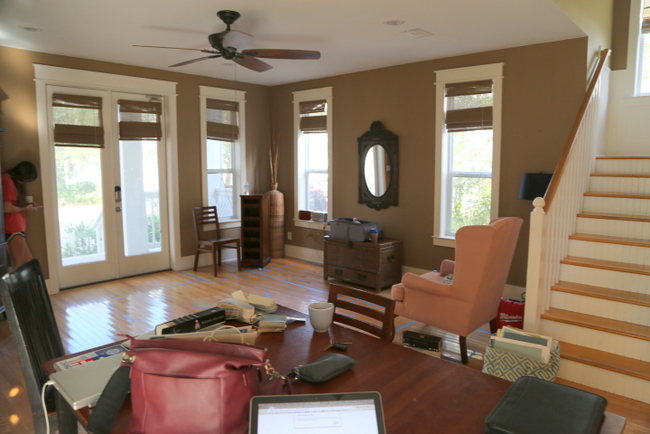
In this area of the house, nothing will be kept – but I do have plans to repurpose some of the bedroom furnishings, which I’ll show you another time. There are several goals I am trying to meet: 1) maximize earning potential for the new property owner, 2) provide a boutique experience for visitors, and 3) create a unique and high end design that will set it apart from the typical beach-themed neighbors, and 4) not blow the budget.
I don’t want this house to look like all the other beach or nautical themed homes in the 30A area of the Gulf Coast. Nor do I want it to feel like “home away from home.” Instead, I want visitors to have a vacation experience that restores and inspires creativity.
Here is my Inspiration Board for the “new” living/dining area:
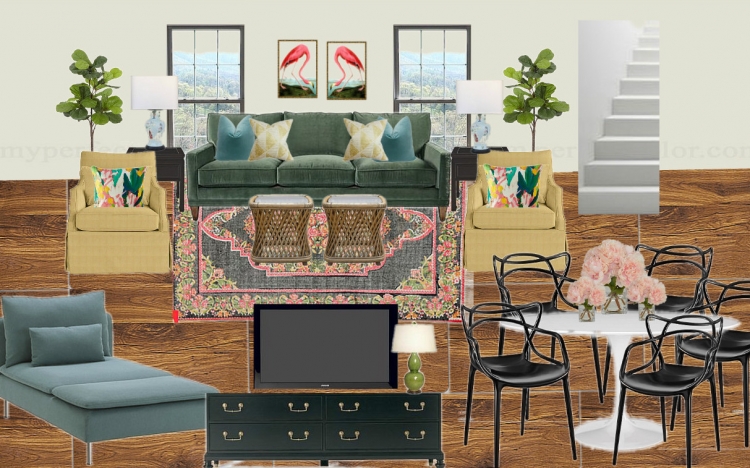 Living/Dining Room Design Plan
As the sofa will likely get rough treatment, we decided to go with a dark color fabric that is removable and washable. Rather than sinking several thousand dollars into a high quality piece, we decided to purchase this IKEA version.
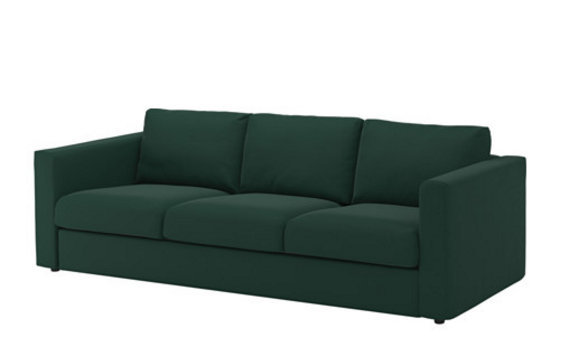
It’s actually very comfortable, and some fabulous pillows will elevate the look.
I found some high quality vintage club chairs at an estate sale that are being reupholstered in this indoor/outdoor fabric. It’s practically indestructable:
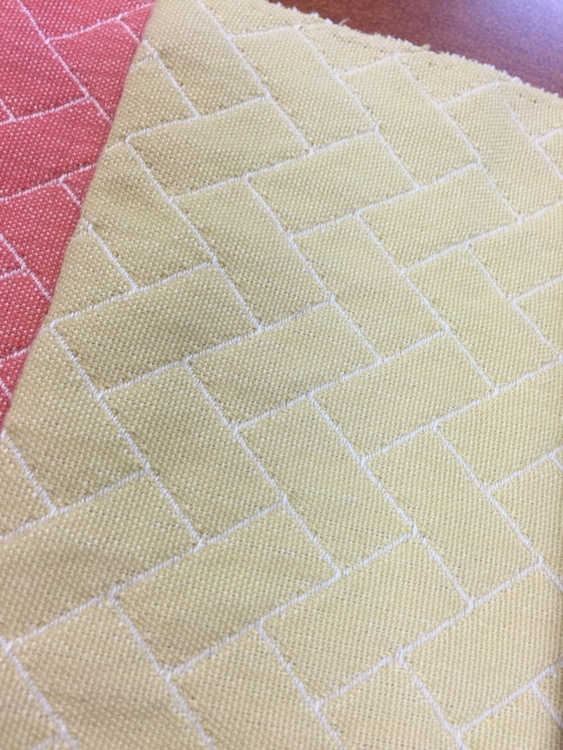
I also found this gorgeous mid-century dresser from an estate sale that I am painting and repurposing as a credenza to sit beneath a television opposite the seating area of the living room.
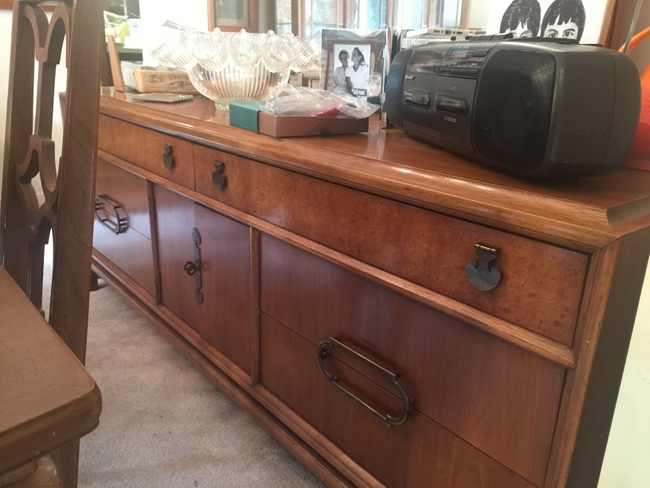
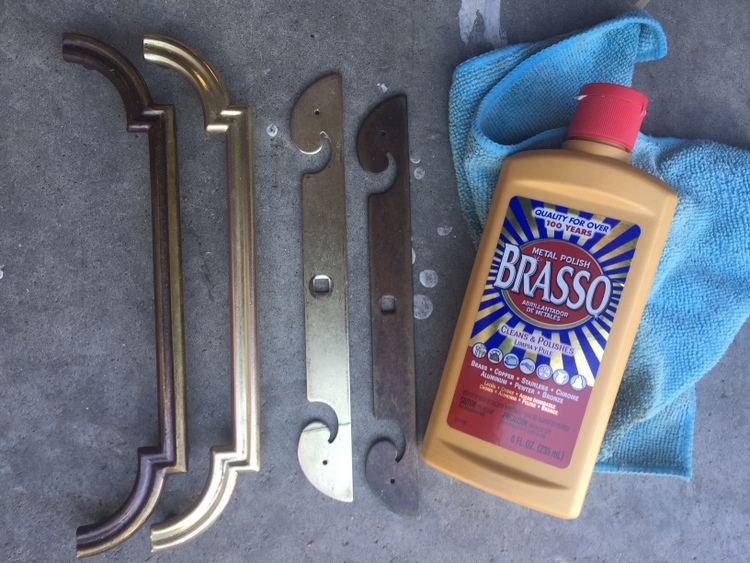
The original hardware is ah-mazing, and I wanted to restore it to its original luster. I purchased Brasso, because I heard that was the best thing to use. It works, as you can see in the photo below where I put the restored versions next to the pre-restored ones:
BUT, I must tell you that it isn’t quick and easy. It’s an exercise in patience – I spent over two hours buffing and polishing these to get them to this point.
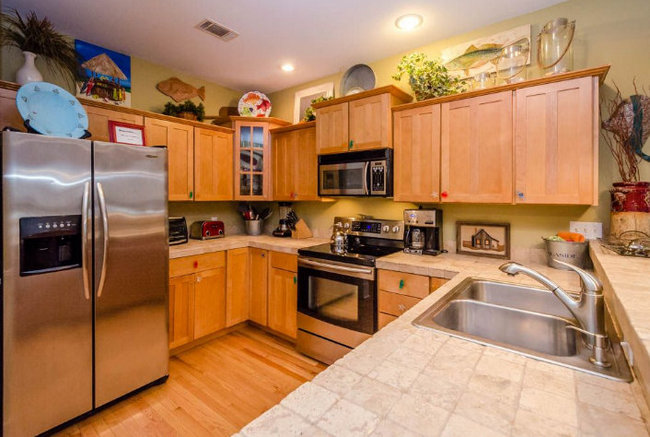
Ok, now take a look at the adjoining kitchen in its “before” state:
 before
The cabinets are nice, but I’d love them to go to the ceiling. Rather than replacing them, we have pulled off the upper cabinets and will do floating shelves on either side of the stove and its new hood that will extend to the ceiling. I plan to rehang one pair of the closed cabinetry to the right of the refrigerator.
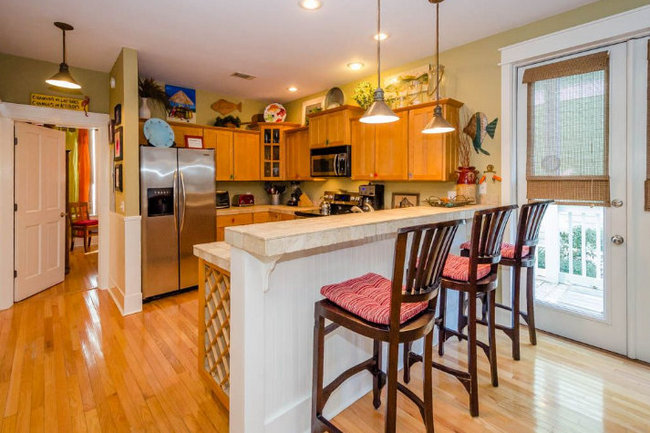 before
Both the cabinets and floors are very orange, and the countertops are a thick, dated travertine tile. The stepped-up bar counter will be knocked down to regular counter height. This will open up the space and allow for a gorgeous expanse of new Cambria quartz countertop. The oak floors have now been stripped and re-stained, and the base cabinets and this white beadboard will be painted out a dark emerald green.
Here’s my vision for the kitchen:
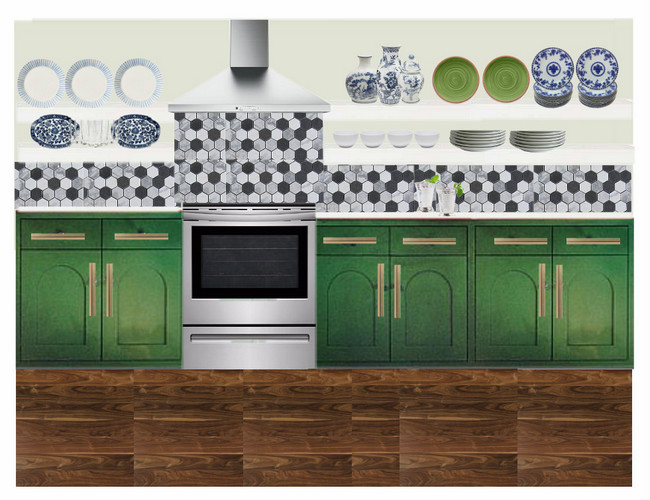
Since the kitchen, dining, and living area are open to each other, the idea is to make this look less like a kitchen and more visually similar to the rest of the new furnishings. Plus, the openness on the upper walls will make the entire room appear larger and the ceilings higher.
Here’s the new oval tulip table I purchased for this design project – it will take up less visual space than the dark heavy rectangular table that was there previously. I’m pairing this with six black chairs pictured in the living/dining inspiration board, which are currently boxed up in my garage.
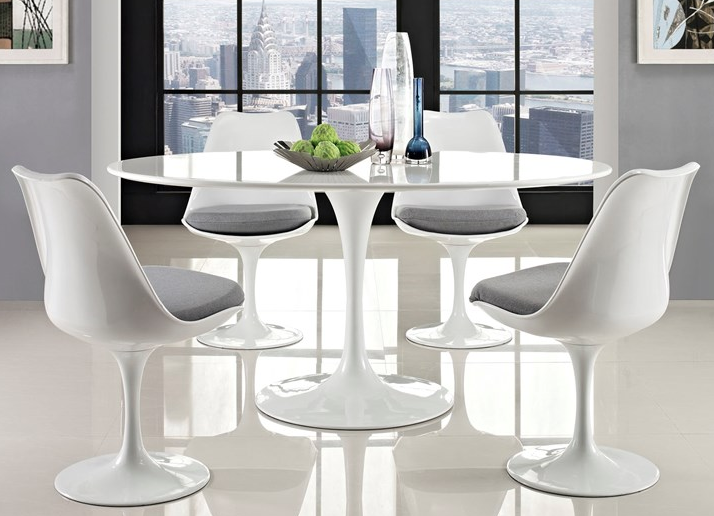 find this here
The property is 7.5 hours away from Nashville. I’m purchasing all of the furnishings here locally or ordering online – most of it has already been delivered to me and is waiting in our warehouse to be trucked down to its destination after some minor construction (details to come) and all the painting is completed. I’m heading down there this week to check on the progress and meet with tile and countertop vendors.
Stay tuned for progress and plans for the other rooms in this dream design project, including three bedrooms and two bunk areas. I often post things on Instagram and Facebook that don’t end up on the blog, so follow me there if you like!
Registration is OPEN for the March 2018 Expert Psychological Stager course. We are approved by the International Association of Home Staging Professionals, and are a RESA® affiliate training program! You can find out more here:









The inspriration board is SO beautiful! and I LOVE, LOVE the credenza you found to anchor the TV- that hardware is PERFECT:))) I simply can’t wait to see it as it comes together…and I think you nailed the “boutique experience” in the design that you set out for- I know I would want to stay here!!
Thanks so much, Elizabeth – I have high hopes! Looking forward to getting my eyeballs on the actual progress down there . . .
Wow, Kristie, congrats on your dream project! All of your ideas are wonderful! Can’t wait to see the finished space and the additional room reveals!
Thank you, Laura! We hope to have the house done by January, ready for rental before the spring rental season 🙂
This is going to look fantastic! I LOVE all of your choices here, Kristie.
Good luck with the project. I’ll be watching for updates in my inbox. 🙂
Thanks, Molly! I just got one of those fiddle fig trees in this afternoon, and it looks great 🙂
SO jealous!….not only that you get to do this, but also I’m jealous of a beach front property right now! Can’t wait to see more pictures!
Paula, it’s not actually beachfront – but it’s exactly 200 steps to the beach! Plus the neighborhood pool is in front of the house next door – it’s going to be a great place to stay!!
Love your choices Kristie! Can’t wait to see it all put together. A great place to stay? A job with extra benefits? 🙂 Sounds great!
Let’s hope it’s a great place to stay! The location is pretty ideal, 200 steps to the beach . . .
Like that it’s not super beachy. A nice transition.
The fabric you selected to do the club chairs, is it sunbrella?
Maxine,
It isn’t Sunbrella (although I LOVE Sunbrella). It’s Al Fresco Functional Fabrics. The pattern is called Abaco and it comes in about 10-12 colorways.
Kristie, if you don’t mind me asking what program do you use for your inspiration boards? Love it. Thanks!!!
Of course, Jennifer! I use Olioboard for my inspiration boards. It’s a great little tool – you can use items in their library or upload your own from photos and online catalogs.
What a dream project I love beach living! Can hardly wait to see the finished results Kirstie 🙂
Thanks, Tamara!
Now this IS a project you can get your teeth into, Kristie! I appreciate your idea to keep away from the typical beach house image.
I think having a family of your own has kept your feet on solid ground. Yet, I know it will look sensational ….and be practical! Can’t wait to see “ Chapter 2!”
Love this project, beautiful choices!
How fun! You have been rearranging beach homes for years LOL!
That is too true! How many times have I done a little rearranging/realigning at rental beach homes . . .
Shelley, this house is in one of your fav neighborhoods!!! 😉
Love it. Can’t wait to see more, Kristie!
Totally agree, it’s a dream project! And it’s looking great so far. The hardware on that midcentury piece is really amazing. I love re-purposing and can’t wait to see how this all comes together. Have fun!
Thanks, Allyson! After all that polishing, I’ve misplaced several of the hardware pieces, ugh! I’m sure they are somewhere in the warehouse, but we have so much furniture and decor waiting to be taken down to the beach house that it’s getting crazy. Let’s hope I find them soon!